April 2005
4/03/2005--Busy day. New fan belts, only two, for alternator and power steering. New fuel line from fuel pump to carb, new filter element. I went to bigger fuel line, and got rid of the metal "brake line" that had been supplying fuel, but constricting the flow. I now have 3/8 line the entire way from tank to carb. I rerouted the fuel line under the engine, tied it to some steady suspension parts, and ran it up to the carb and the fuel pump.
Ordered a new cam and lifters. Maverick forum guys told me to order a summit kit, part number SUM-K3600, Duration 262/272, lift .448/.472. They said it would work great with the low compression/low RPM engine. And will work even better when I put headers on (soon). Got some hints from the forum to help install it, since I have never swapped a cam.
Also drilled a hole in the firewall for the coolant temp wire, tach wire, oil pressure tube, and vacuum for the vents. Put in a rubber grommet to keep wear down and ran them all through. The drilled hole was 1 1/4 but the hole is closer to 3/4 to 1". When I ran all the lines through, it pretty much closed up the hole so minimal air should come into the "cockpit". Had to replace the brass fittings for the oil line, since one had cracked when tightening, and was leaking oil a bit.
Found a "gasket" for the steering column hole in the firewall, but have not ordered it yet. It is in Autokrafters, pg 2. Guy on the forum told me where to find it. I need it, but will wait until I buy the power-to-manual steering converter, to save on shipping.
Put on a new PCV valve with a 90 degree bend for the hose.
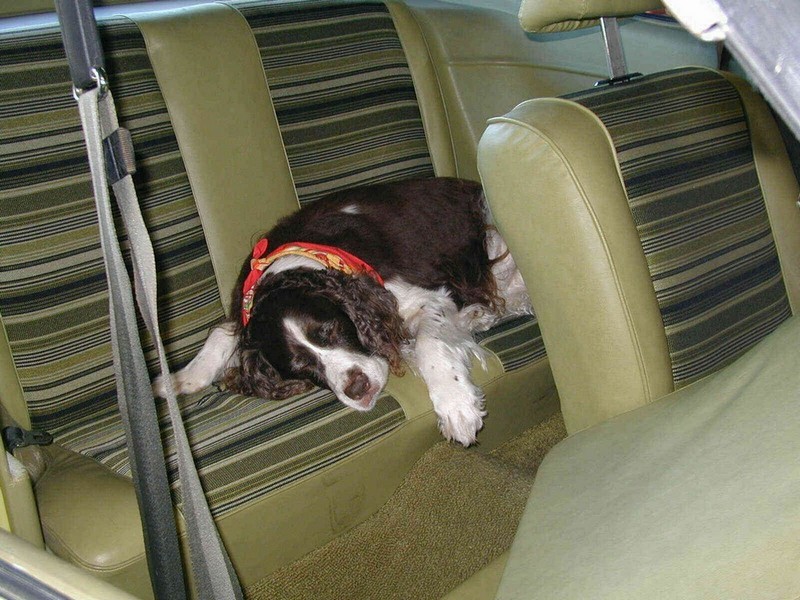
While watering the grass, we sat out front in the driveway and let the dog roam around, leaving the door open to the Mav. She got in and got comfy. See pic below.
sub w/tax = 17.30
4/10/2005--Busy day. Again. My cam came in Friday, so I started to take the engine apart for the cam swap. Now, I have read quite a few magazines discussing "cam swaps" and they make is sound easy, like a "spark plug swap." Don't fall for that crap. A cam "swap" is a hell of a lot more work than any other kind of "swap" you can think of.
I assumed I would take off the intake, the timing chain cover, pull out the cam and lifters, put the new one in, and go. No.
Take off the power steering pump, alternator, radiator and hoses, fan, harmonic damper, carburetor and intake manifold, all rockers and pushrods, all spark plug wires, spark plugs (which is a major job with those shock towers), water pump, fuel pump, and NOW the cam chain cover. Getting lifters out was a hassle, er, 16 hassles. I ZEPed each of them while gripping the lifters with vise grips, tightly. Twisted and pulled about 5 minutes each to scrape off the varnish that had accumulated on the bottom end. Cam was similar, the varnish needed to be worked out slowly, by turning and pushing and pulling until it worked it's way out. Grease the hell out of the cam with special lube, work it back in, grease the lifters with special lube, put them in, and start to clean and reassemble the engine. Got all but the fan, radiator, and intake assembled today (Sunday). Worked about 4 hours Friday night, 5 or 6 hours Saturday, and all day Sunday.
Then I have researched the "break-in" for a new cam. If you don't do it exactly right, it will break. It has to start immediately, no turning without starting the oil flow. Immediately rev to above 1500 and under 3000, and keep it there for 20 to 30 minutes. Not much room for bad timing or poor fuel flow. It has to start right the first time. Kinda worried, but will take my time and do it right.
4/12/2005--Busy day. Again. Again. Got the car reassembled, except for grill and hood. bought 3 magnetic screwdriver extensions, the ones that hold magnetic screwdriver bits, and used them to prime the oil system until oil came out of the rockers, then again just before firing it up. Got the distributor on as close to 0' TDC, then advanced it a bit, just guestimating. It started after two turns (ruuh-ruuh-VRROOOMMM!!!) Had to run it between 1500 and 2500 RPMs for the first 30 minutes, so choked the carb and then ran up the idle screw until the choke kicked off. Guessed this would be around 1500 when it started up. They say if you let the RPMs drop below 1500 at any time that the lobes may rip off the cam or gall to the lifters. In other words, scrap the entire job within the first 20 minutes or sooner.
I was warned that it would run a little smoky at first as it burned off all the assembly lube. Well, it smoked ALOT, and ran a little rough. And little bits of burning paper came shooting out of the pipes! I put wads of papertowels in the intake ports of the heads to keep little pieces of junk out of them while I was working on it. But, apparently I left BIG pieces of junk in there, and they blew out for the first 30 seconds or so. Once they burned and blew through, it ran very smooth at high RPMs. After 30 minutes, I dropped idle down to 1000 RPM and drove around the town a bit, and on the highway for about 10 total miles. It ran really nice, but I can tell that this cam may be a little "over-cammed" for my current configuration, and this really wants better heads and headers for increased flow. I still think I picked up approximately 30 horsepower. A guy on the internet said I should be at around 250 HP right now. I don't think so, but I may be there or even over that with new heads and headers. Maybe by the end of the summer...
Once it cools down, I have to swap the oil and filter to get all the junk, coolant, lube, and PAPER out of the oil. Then I am ready to go.
Parts:
gaskets and seals $10.78, timing chain and pulleys (single roller) 19.99, a harmonic balancer puller (tool) which will not be added to cost 14.99, cam and lifter kit 82.96, 12 qts HD 30 wt oil, 2 PH8A Fram oil filters, various bolts, and the screwdriver bits.
sub w/tax = 143.52
4/19/2005--Have jacked up the back of the hood by about an inch to create a nice "cowl" flow of cool air through the radiator, over the carb, and hot air out over the windshield. Also cuts down on air drag as it hits the firewall and is forced downward, kind of like a parachute. But, I could never get the hood squared up, due to bent fenders and such. Also, with the hood latch being in the center of the hood, it would latch and spring load back up on one side by about 3/4". So, the hood was uneven and looked like crap, despite working well.
Yesterday, decided to buy some hood pins. They are cheap, Mr. Gasket brand, but the most expensive ones I could buy in town without going through a catalog. Drilled the hole today, mounted them up, bent one of the metal plates, but that is OK, since the cheap plates will not last long, and I will buy better pins. At least the mounting and holes are already completed. On top of the pins but under the hood, I used a chunk of rubber (bumper from a big truck's rear springs, I found in a parking lot). Cut it down to small cubes about 1" to the side. Drilled a hole so it would tightly go over the pin and not slide around. Used a drill sander and kept sanding the rubber down until the hood fit about where I wanted it to. Then sanded the cubes to approximately a cylinder, just for looks. Will also sand the rubber blocks at the rear that jack the hood up, as the squared parts stick out the sides a bit. The hood now sits pretty much square on the engine compartment, with even gaps along both sides and the rear, and straight along the front (except for bends in the fenders).
sub w/tax = 14.06
I took it for a hard spin to make sure the hood would not bump or flex with the wind. It held very steady. Decided to come home, recalibrate the idle mixture, since it seemed to smell rich since the cam swap. Adjusted the idle up to about 800, so it would hold around 650 in gear. Still lopes a bit, but not as much as when it idled at 500 in gear. It sounded really good, but was slow on the takeoff and I kept feeling I needed one foot on the brake and one on the gas to prevent stalling.
After the hard spin, I drove first gear at 3000RPM until I got home, got into the garage, held 3000 for about 30 seconds, and killed the engine. Pulled the number one plug, and it was clean, dry, and light brown on one side but creamy white everywhere else. Maybe a little lean, or maybe a little too far advanced (36' at full throttle, 20' at idle), but still a safe color. Broke the number one spark plug wire, as I did the number 2 or 3 when doing the cam swap. When I did the new carb, I bought the cheapest wires just to get it running. Now, I will need to buy good wires and get it ready for multi-spark.
Also, noticed that the plug was gapped at only .020, and should be .032. I will take them all out, gap a bit larger at .035, then new wires, distributor cap, rotor, and run it.
4/21/2005--Got new plug wires, 8 mm Accel custom fit with thick silicon boots to take the heat, and remove without falling apart. Gapped out the plugs to .035 or so, cleaned out the distributor cap and rotor. They both need to be replaced, probably tomorrow. The distributor holes were rusty, crusty white, and there were little burn holes just in front of each of the electrodes, probably from too far advanced timing. Backed the timing to 14 degrees at idle. Verified the points were gapped at .017, and they look good. They came with the new "stock" distributor last year. Ran it around town, runs much smoother with the new wires. I guess I had poor current or grounding with the older smaller wires.
sub w/tax = 32.46
4/22/2005--New distributor cap and rotor.
sub w/tax = 17.08
4/23/2005--New Accel 8140C Super Stock coil ($40.04), mounted it on the passenger wheelwell, and off of the manifold. When I finally go to the MSD (Multi-Spark Discharge) model 6AL (with an adjustable rev-limiter) it will be mounted there as well, or possibly inside the car under the dash to keep it dry. Also bought some zinc-coated cable and crimps and tied my hood pins to the frame. I am upset with the quality of, not the pins, but the round metal protector to keep your paint from getting scratched. These are not much thicker than tin foil, and scratch each time you put the pins in, and bend a bit also. I will have to find better plates, or have someone make them out of stainless. Maybe 1/16" thick with a bit of felt or such underneath to keep a little cushion between the plate and the paint. Will still screw them in. Kinda miss working in the machine shop, or having dad in there, so I could draw up plans and he could make them for me.
Also bought Split-Fire spark plugs (8 for $39.75). These have a Y-shaped electrode for a better and more sporadic/spread spark. Since the new coil puts out at least 25% more juice, I opened the plug gaps from .032 to .040. I ran them a bit, and pulled one to check it out, but it was still white from being new. I may run them a while and then pull them after a race to see how the engine is running. It doesn't smell as gassy, so I assume that the gas is burning more efficiently. As far as I know, one or more of those old wires may have been arcing and not firing each time. Now, it idles much smoother, does not spit and sputter at all, and seems to have a bit more HP. Wanted to go to the track today and test it out, but they are only open on Fridays during April, and will open Friday and Saturday in May. I will have to make a few passes, check out the plugs, mess with the timing, etc and get it up to par for the parts I have added. I better have picked up at least a half-second on my passes.
After the successful cam change, with the significant increases in HP for relatively little money, I am getting addicted to this and am spending more than I have budgeted. I feel almost obsessed with getting headers and heads and really letting this project live up to it's potential. Then I will slow down and wait for the engine rebuild. As long as it is running good, I cannot justify rebuilding an engine with under 60k on it. So, I will run it hard and try to wear out some rings so I can justify a rebuild.
sub w/tax = 79.79
4/24/2005--Forgot to mention, I took the back seats out a couple days back, since Tuesday had torn a hole in the fabric, and was starting to tear the foam. I want to keep the foam (and as much fabric as possible) in good shape so I can later have it all re-upholstered in leather or vinyl. Today, I took out all the black "tar paper" from under the seats, carpet, and behind the seat, and lo and behold, the trunk! The trunk is separated from the driver compartment by nothing but a thin layer of tar papered cardboard, then the rear bench seat. Good excuse to put in a metal or plywood "firewall" with a large speaker or two, to divert my attention away from the loud engine noise.
Bought 2 rolls of 6'X3' carpet, $10 each. I will pull the front seats out, one of these days, and put a temporary carpet job in. Tuesday slides around in the back "seat" area, now that it is just metal. There are some screws and stuff that need to be worked around, or removed.
Took Anna for her first ride in quite a few months. She was afraid to ride in Della due to the excessive exhaust/fuel smell she emitted (Della, not Anna!) Well, now that I have swapped cams, added a more powerful coil, new wires, distributor cap, rotor, and plugs, Della runs with almost no smell whatsoever! You can smell it a little when she first starts up, and is choked, but it doesn't burn your eyes and stink up your clothes (and garage and house...) like it used to. Anna is very impressed with the increase in power. Her response was "I can't believe you have turned into a hot-rodding redneck!" Buying a hemi-laden full-size Dodge pickup was the first warning...
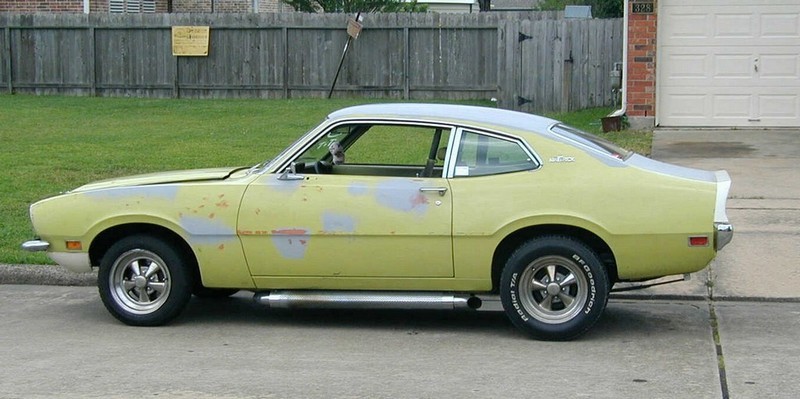
Long story short...runs great, looks like shit.
But, I refuse to do body work until after everything else is finished. That way, we aren't screwing up the paint while making modifications and pulling engines.
sub w/tax = 21.54
4/30/2005--Went to the track last night, and after all this work, no improvement on my 1/8 mile time or speed, at least not a significant improvement. Kinda pissed, but recognize that the low compression and poor heads and lack of headers is going to limit what the engine will do. I guess I have reached that limit.
Today, I finally got those front rims to a used tire store. Asked the guy to pull the tire of so I could take the rim home and start pounding it straight. He put in on the tire machine, pulled off the tire, put a big pipe wrench on the bend, straightened it out most of the way, and said "you want the same size tires?" I asked for a bit bigger, 205 rather than 195. He said he did not have that size and put on two 195/60R15 for me. They are good tires, but when I put them on the car, they are a bit small. I figure I would drive them a while, then try out 225 or 235 later, if they will fit on that rim. They look better than the stock tires, either way.
sub w/tax = 51.65
total = 4217.01