August 2005
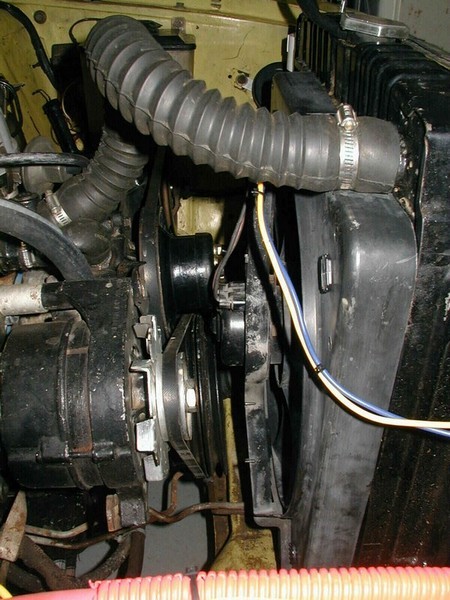
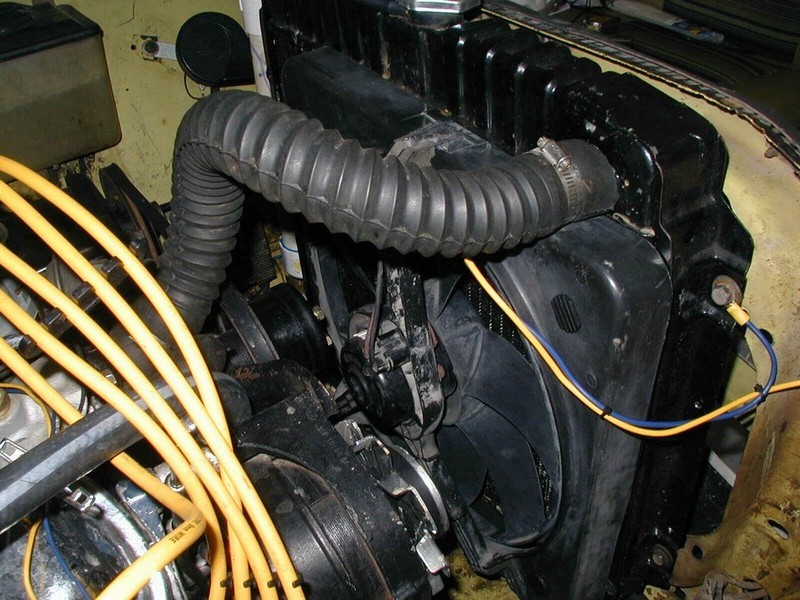
8/14/2005--Back to C&R Auto Salvage for another fan. Found one on a Chevy Cavalier, early 90s model, 16X16.5X4.5, so it was pretty narrow, compared to the 6.5" thickness on the last one. This one fit inside the engine compartment and drew air in through the radiator, as the original fan did. It is about 4" narrower than the radiator, so it is not drawing air through the entire surface area of the vanes, and this raised my running temp about 10 degrees on the hottest of the hot days. The day I test drove it, it ran right at 180 until I hit the highway and ran 70+ mph, over 3200 rpms. It then started to slowly climb to nearly 200 degrees, which is still a safe running temp, but as hot as I want it to get. The outside temp was a balmy 98 degrees, with our typical humid conditions. I am also still running lean on the carb, so when I fix that, I should cool down a bit.
Fitting this on the radiator took a little fiddling...but it finally fit snug to one side just offset of the old fan pulley, which is still installed as it turns the water pump and power steering pump.
As I got to working on rewiring this one, I went ahead and replace all the heavy 4-gauge wires that run from the starter solenoid to the engine ground and starter. These were rusty, showing bared spots from the insulation peeling off, and really were unsafe, and a fire/short hazard.
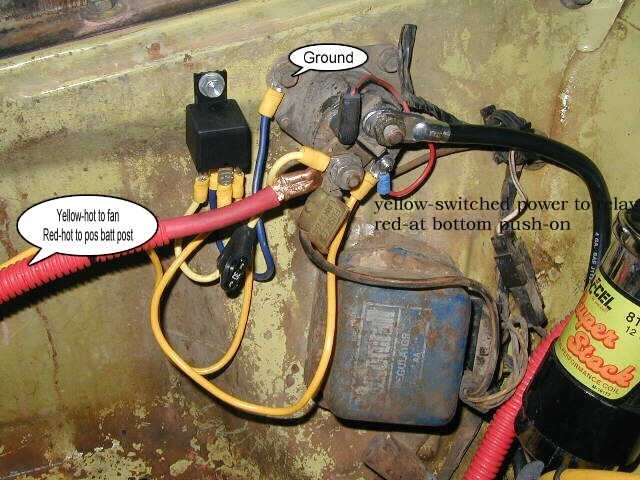
I am now looking for a new alternator to get rid of the voltage regulator, which is the rusty blue box in the picture above. The starter solenoid, usually mounted on the starter, is the round item screwed onto the fender with all the wires going into it. The black cable on the right goes to the starter, and there is a similar black cable screwed onto the engine block and bolted onto the frame outside of this picture, that is the engine ground.
On the forum, we have been discussing the benefits, in Horsepower, of removing the steel fan. It has been estimated at a 20 HP improvement, and it feels like it on the road.
sub w/tax = 36.73
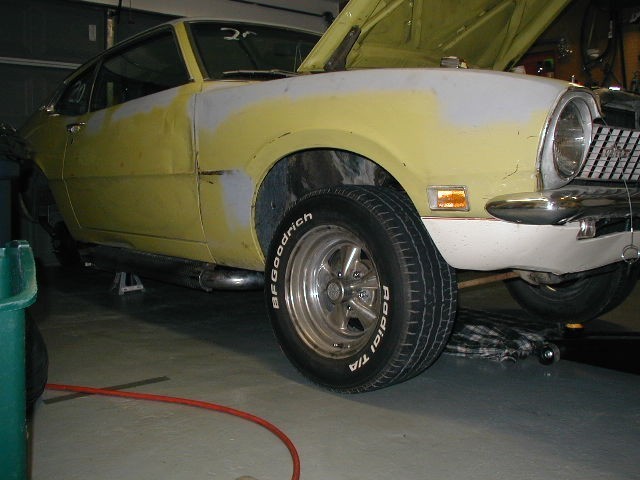
8/19/2005--Now the front end sits really high, from a combination of those crappy 195/60s that I have on the front, and the new stronger front coil springs. So I borrowed the coil spring compressor from Hi Lo, and got to it.
I calculated the height of the tires I want, 225/60r15 as 25.6" diameter, and the rear tires that I have on it now are 26.6" new, but mine are nearly smooth and bald, so I put a level on the top of them and measured them at 25.25", which is close enough for an estimate. I jacked up the rear and put jack stands under it to hold it level to within 1/4", and at about the height it will ride with the tires mounted on them. Then I put the rear tires on the front. They are a bit wider than the 225s will be, but they are about the same height, and height is what I am working on here.
I am looking to get the top of the tires even with the bottom of the fender, or at least within an inch of it. Then I will put the old 195s back on for a while, until I can justify financially, to buy the new 225s. The alignment is currently shot after putting in the new springs, and cutting the springs will only make it worse, and I don't want to drive around on new tires with a shot alignment. So alignment and new tires have to happen within a couple days of each other. Plus, somewhere in between, I will likely want to cut the springs a bit more to get the exact ride height that I want, after I put the 225s on, and get them just right, before aligning it.
Estimates from the forum suggested to start by cutting 1 or 1-1/2 coils off to start. I was conservative, and cut 1 off first using a rotary cutter on a "pencil grinder". Put the wheel back on, without the shock, and dropped it back to the ground. I originally had 4-1/2" between the fender and tire, and the one coil brought be down about half-way. Spring off again, cut another half coil, tire on, cut the other 1-1/2 off, tire on, and back to the ground. Much better. It still has no shocks and hasn't moved (back tires are still on the front, no tires on the back), but the ride height looks much better. I will reassemble tomorrow, putting the shocks back on and the old tires, and drive it a bit and let everything "settle".

Again, after I drive it a bit and things settle, I will put on the 225/60r15s, and probably drop it another inch or so, so the front tires fit snugly in the fender well. Nevermind the mess in the "After" picture. It was so hot in the garage, that when I finished putting the car on the ground, I left all the tools where they were and just ran in for a shower. Removing the springs requires taking out the outside half of the shock towers, top half of of the towers, the cross-brace to the towers, shocks, and tires on and off, so many tools are required, and therefore, laying around.
Another project in the near future is putting on a new alternator with more amps and with an internal voltage regulator, so I can scrap the blue box (picture above) and have power to run a large stereo and A/C someday, and to charge the battery faster.
Also, probably to finish this weekend if I find the time, is a slow drain in my battery. I spent quite a bit of time trying to find it, and narrowed it down to something on fuse #2, which, luckily, is the dome light and key warning buzzer, which I hate, and will likely remove. My guess at this point is either the buzzer is shorted (probably not, but it is coming off anyway), or more likely, one of the two switches that activate the dome light when the doors are open are not turning completely off when the doors close. Currently, I just have the fuse removed. The drain was very slow, but enough to make starting "iffy" after setting for a while. The battery charges back up nicely, but let it sit a week or two, and it turns over really slow. Luckily, the engine is running so well that just a couple turns and it starts, but I still worry about it when it runs that slowly. The drain appeared to be 13 volts, but I was unable to determine the amperage of it. When I pulled the dome light out, it dropped to 10 volts, and when I pulled the fuse, it dropped to nearly zero (I could see the needle was not on zero, as it moved when I touched the battery, but it was not measurable).
Another project, on the side: I am looking for a 351 motor to tear down to the block and bore and stroke to 393 or somewhere in that range. It will still fit with the shock towers, barely, but will give me loads of extra horsepower without having to go to nitrous, which I don't trust yet. I might use a blower or supercharger in the end, and if I learn to trust nitrous, maybe a small 100 or 150 shot, but for now, I want at least 500 HP on naturally aspirated motor, and this will be hard with the 302. I cannot justify taking this 302 and pulling it out and tearing it down, since it just turned over 58,000 miles and runs too good to mess with. Plus, if I am building a 393 on the side, I can still drive the 302, and stop sinking money into the 302 motor. Maybe work on the transmission...
The transmission has acquired a serious leak. Notice the folded bed sheet under the car. That is not for napping between projects, that is soaking up my fluid as it dumps onto the floor. One of these days, it will leak bad enough that they won't let me on the track. It has always leaked at the shifting lever. There is a small seal in there that has worn out, and is just getting worse as I use it. Plus, my mistake, I once thought I saw fluid leaking from the pan, so I tightened the bolt a bit, and I think I bound the gasket causing more leak. I will soon buy the seal, if I can find one, and a B&M shift kit (less than $30). To install the shift kit, you have to pull the pan (so I can fix the gasket) and pull the bottom guts out of the tranny (so I can replace the seal), then replace the guts with the B&M valves, and reassemble. Should fix all my leaks, plus shift quite a bit better. Need new fluid also, as mine is getting nasty from the hard and hot driving. Those burnouts are really hard on the fluid. Might even re-route the fluid back into the radiator and then through the external cooler, just for extra cooling. Currently, I disconnected the radiator connections and am running through the external cooler only.
8/20/05--Here we go...Now that looks like a hot rod!
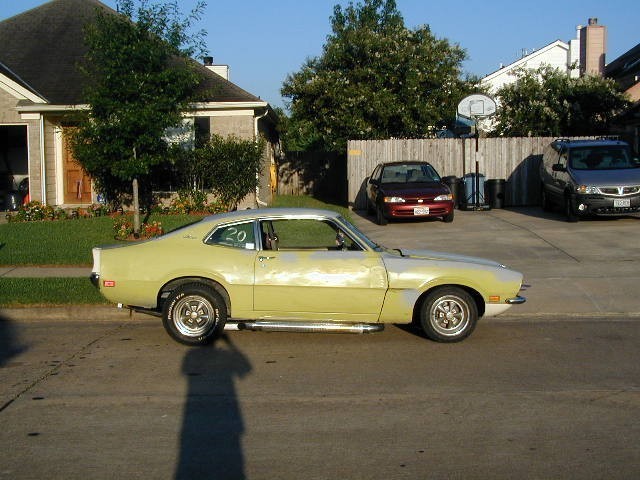
Horrible picture, though, with that shadow of a giant looming in the foreground.
8/23/05--I bought the seal and o-ring ($7.29) I need to seal up my transmission yesterday, but the guy at the Ford parts desk says it is a band-aid fix, as the rest of the seals inside the tranny are just as hard and brittle. He recommended that I "rebuild" the trans with all new seals before I install a shift kit, as the kit will increase pressures and possibly blow out the inside seals. I have posted the question to the forum, to help me decide what I will do about that; rebuild, or just shift kit for now.
Today, the weather was hot, but a little drier, so I got the fan going in the garage and got under the hood. I pulled out the "yellow box" that sits right where a stereo would go. I have wondered what it is, every time I get under the dash, that thing is in the way. About the size of a stereo unit, bright yellow, and has a 13-wire harness going into it. On the forum, I found that it is the Seat Belt Interlock System, Federally mandated in late 1973, and un-mandated in 1974, but installed in all 1974 vehicles. It forces you to hook up your seatbelts by recognizing that you and passengers are in the seat with a switch, then not letting the car start until all switched seats have the seatbelts plugged in. Most guys just cut the wires under the seat, but I wanted that thing out from under the dash. Some of the contact were starting to corrode, one looked kinda burnt, so I did some research to un-install it. I had to go to the "red button" under the hood, which again the forum guys have pondered over what it is and what it does. Apparently, it is a one-time only button to disable the "yellow box" so, in case the box malfunctions, you can get the car home or to the shop. I removed the button a few weeks back, since it was dead (maybe one-time is literally what they mean, it can be used only one time!). I found out that if you connect all the wires from the red button together, it bypasses the yellow box. Good thing, since the yellow box affected headlights, running lights, starting, domelight, temperature sensor, and some other things, generally killing the car if it was not working correctly.
Also today, since I was under the dash and messing with electrical stuff, I found the drain on my batter that has been causing me trouble for a while. I checked out the two door switches that trigger the dome light, and tested all the wires to them and the light, then tested the wires to the "key-in-ignition" buzzer. The switches were all OK, but to get to the buzzer I had to take out half the dashboard...it was located on the right metal pillar under the dashboard but up just below it. Unplugged it, tested the battery, and the drain was gone! Since the dash was torn apart, I put the vanes on the passenger A/C vent back into their runner so that when you moved the little lever, all the vanes moved with it. I don't know how long that has been out of commission.
Also, got a power cord for an old radar detector that has been in the garage for a while. I lost use of the cigarette lighter for a while, but fixed that fuse and circuit a bit back, so now I have a "fuzz-buster", which may not be a good thing...
sub w/tax = 7.29
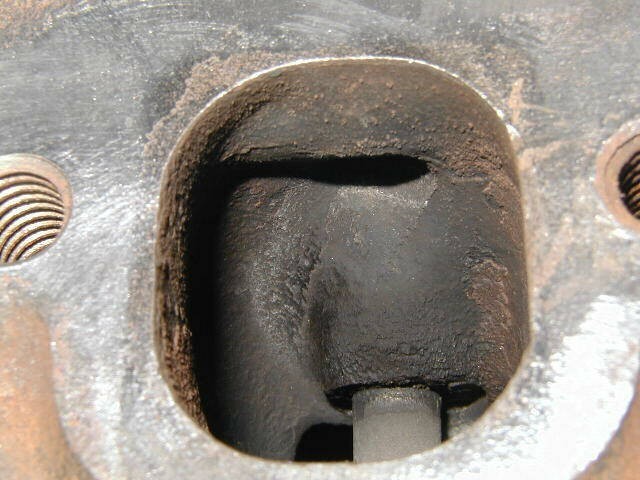
8/26/05--Found some GT40-P heads on E-bay for $125 starting price. These typically get up to around $500-600, so I called the guy up. He was local, Spring, and said he would take them off E-bay and sell them for $200 for the pair. I hopped my happy fanny up to Spring, found his shop, and the heads looked really clean and nice. They came off a 1998 Ford Explorer. These are the best heads that Ford makes, with something like 20-30% more intake and exhaust flow than the stock heads. Plus, the spark plug is centered almost to the middle of the dome, so the fuel flows from intake, to spark plug, to exhaust. They are a bit more difficult to install headers on, since the plugs stick almost straight out into the header tube. A guy on the forum uses them, and says to buy Accel shorty plugs and 90 degree plug boots. Even then, he has to pry the header off to get to some of his plugs.
I will probably cut my towers while I have the heads off, and have one of the local guys weld on the plate to complete the shock tower cut. Until then, I am porting and polishing the exhaust ports. There is a "smog bump" at the top of each port that I am grinding off. Then polishing up with a dremel tool. I will also "gasket-match" the ports so that they are ground as large as the holes in the gaskets, both intake and exhaust, and probably the intake manifold also.
The heads did have a broken manifold bolt stuck in the hole, and I had to drill and try to get it out. It would not come out, as it had galled to the threads. Drilled and tapped, but when the tap hit the old bolt, it just snapped. Then had to use punches to chip the tap to pieces and pull it out in chunks. Then drilled into the bolt remnants with a larger drill, and it caught the remnants and yanked them out. The hole was a bit larger, and when I tapped it, the manifold bolt would screw in, but wiggled a bit. I may have to drill and tap to the next bigger size and use one odd larger bolt. Since the bolt was stuck in there, the guy dropped $25 off the final price.
B&M Engine Supply, 121 Caroline, Spring, TX 77373 (281)651-7278/(877)844-9832

sub w/tax = 187.68
8/31/05--I am cheating a bit, since I am really writing this on 9/3, but have not totaled out the month yet, and really haven't done anything substantial to start a new month. I re-routed the trans cooler so that the fluid goes through the radiator first, then through the cooler, then back into the transmission. Used existing connections and hoses, so no money spent.
Also, bought and refunded a few exhaust gaskets. But eventually found out that the headers will come with one. Found Hooker 6901-1 (ceramic coated) on e-Bay for $45, bid it up to $135, then backed off, since the other guy apparently went up to around $200. I can get new non-ceramics for $150, and the ceramic on the Hookers is supposed to be poor, lasting only a year or two. I refuse to pay more than a new set of non-coated for them, so the other guy can have them. I will be wrapping the first 8-12 inches of the headers in header wrap anyway, to keep the plugs cool, and won't see the top of them anyway.
I have done a bit this month. Heads are ready to be milled down .025 to give me an extra .5 compression ratio. Then headers and install. A smaller head gasket might net me 8.8:1 compression, compared to my current 8.0:1, added to extra flow from the heads and headers, and I think I will be busting 200 HP, maybe up near 250! We will see how it handles on the track.
Tomorrow (9/4) I will drain the trans fluid, drop the valve body, replace the seals that have been leaking, and re-torque the pan so it stops leaking there. Will save up for the $129 TCI rebuild kit plus the $300-400 rebuild, if someone else does it (the extra $100 is if they have to pull the trans from the car).
total = 5253.83